The post Warm Roasted Sweet Potato & Brussels Sprouts Salad with Maple Dijon Vinaigrette appeared first on Farm Girl Next Door.
]]>
The best salads, in my opinion, don’t include lettuce.
And don’t even get me started on roasted vegetables.
Show me a pan of those, and there’s a good chance I’ll eat the entire sheet pan single handedly. <– that’s not a joke.
This salad boasts tender, sweet & savory roasted vegetables, sweet cranberries, crispy chickpeas and crunchy pepitas.
Top it all with a simple maple dijon dressing and you, my friends, have yourself an absolutely winning salad.
Enjoy & don’t forget to share a picture of your masterpiece with me on Instagram!
Ingredients:
Roasted Chickpeas:
1 15.5 oz. can chickpeas, rinsed, drained & dried using paper towels
cooking spray
salt & pepper
1/4 tsp. ground cinnamon
Roasted Brussels Sprouts:
2 lb. Brussels sprouts, ends trimmed & halved
1 medium red onion, cut into 1 inch pieces
2 Tbsp olive oil
salt & pepper
Roasted Sweet Potatoes:
3 large sweet potatoes, peeled & cut into 1 in. cubes
1 Tbsp olive oil
2 Tbsp pure maple syrup
1 – 1 1/4 tsp ground cinnamon
Dressing Ingredients:
1 lemon, juiced
1 Tbsp. dijon mustard
1/4 C. olive oil
3 Tbsp. pure maple syrup
salt & pepper
Topping:
1/2 pepitas
1 C. dried low sugar dried cranberries
Directions:
Preheat oven to 425 degrees F.
Line 2 large baking sheets and 1 small baking sheet with foil and spray with cooking spray.
To the small baking sheet, add chickpeas. Spray lightly with cooking spray and sprinkle 1/4 tsp. cinnamon and a bit of freshly cracked black pepper & salt over the chickpeas. Toss to coat chickpeas evenly.
Place pan of chickpeas in the oven and bake for 15-20 minutes or until crisp and lightly browned.
Remove from oven once done.
While the chickpeas are baking, prep the brussels sprouts and sweet potatoes.
On one of the large baking sheets, place the sweet potatoes. Drizzle the potatoes with olive oil and maple syrup. Sprinkle with cinnamon. Mix with your hands to evenly coat the potatoes and spread evenly on the baking sheet.
Place the pan of sweet potatoes in the oven for 30-35 minutes or until tender and lightly browned. Flip potatoes halfway through cooking.
On the second large baking sheets, place the brussels sprouts and onions. Drizzle evenly with olive oil and sprinkle with salt & pepper, to taste. Mix with your hands to evenly coat all brussels sprouts with the oil, salt, and pepper and spread evenly on the baking sheet.
Place the pan of brussels in the oven for 20-25 minutes or until tender lightly browned. Flip brussels halfway through cooking.
While the sweet potatoes and brussels are cooking, add the dressing ingredients to a mason jar if you have a lid for it, or to a medium bowl. After all ingredients are in either a jar or bowl, place a lid on the jar & shake to mix or whisk all ingredients in the bowl.
Set aside dressing until the salad is ready to serve.
Once vegetables are ready, separate sweet potatoes and brussels sprouts evenly into 4-5 bowls, evenly sprinkle the chickpeas, pepitas & cranberries over the vegetables in the bowls, and drizzle each bowl with the dressing.
Enjoy!!
The post Warm Roasted Sweet Potato & Brussels Sprouts Salad with Maple Dijon Vinaigrette appeared first on Farm Girl Next Door.
]]>The post The BEST Healthy Peanut Butter Bars with Chocolate Chips! appeared first on Farm Girl Next Door.
]]>
I dare you to make these and withhold from eating the entire pan.
You might think you have enough will power to resist, but I wouldn’t be so sure. Believe me, I’m a girl who has a lot of willpower but with these bars, I feel a bit powerless.
I’ve also made them for my sister several times and I know she’d agree — these are IRRESISTIBLE.
The nice thing is, they’re healthier than your average peanut butter bar. I like to remind myself of that when I’ve eaten half the pan…
Enjoy, and share them with someone who loves chocolate and peanut butter. AKA, everyone that knows what’s good in life.
recipe slightly adapted from: https://www.livewellbakeoften.com/healthy-peanut-butter-chocolate-chip-oatmeal-bars/
Ingredients:
1 C. creamy natural peanut butter
1/2 C. brown sugar
1/2 C. honey
2 large eggs + 1 egg yolk
4 Tbsp. melted coconut oil, slightly cooled
2 tsp. vanilla extract
2 C. quick cooking oats
1/2 C. whole wheat flour
1/2 tsp. salt
1 tsp. baking soda
3/4 C. mini semi-sweet chocolate chips
Directions:
Preheat oven to 350 degrees F. Spray a 9×13 glass baking dish (or two 8×8 baking dishes if you want to make one for you and one to share!) with nonstick cooking spray.
In the bowl of an electric mixer, add the peanut butter, brown sugar, honey, eggs and egg yolk, coconut oil and vanilla. Mix on medium speed until well combined.
To the same bowl, and the oats, flour, salt and baking soda. Mix on low until just combined.
Add the semi-sweet chocolate chips to the bowl (save back about an 1/8 of a cup for sprinkling on top!). Fold or mix slowly to combine.
Place the bar batter into your baking dish and spread out evenly. Sprinkle the remaining chocolate chips evenly over the top of the batter.
Bake for 20-25 minutes or until the top is set and slightly golden.
Cut into bars, enjoy, and try to resist eating all of them!
The post The BEST Healthy Peanut Butter Bars with Chocolate Chips! appeared first on Farm Girl Next Door.
]]>The post Classic Zucchini Bread appeared first on Farm Girl Next Door.
]]>
This bread is SO TASTY.
The texture is exactly what you hope for in zucchini bread…moist, tender and soft.
It’s not quite ‘health food’, but it does use whole wheat flour and contains less oil and sugar than most zucchini bread recipes.
Feel free to get creative with this recipe – throw in some chopped walnuts, add in other warm spices you like (like nutmeg or pumpkin pie spice), etc!
Show me how it turned out for you by posting a picture to your story on Instagram — I’ll be sure to share it to my story as well! 
Slightly adapted from: https://www.thewholesomedish.com/the-best-classic-zucchini-bread/
Ingredients:
1/2 C. granulated sugar
1/4 C. packed brown sugar
1/2 C. unsweetened applesauce
1/3 C. vegetable oil
3 egg whites
1 tsp. vanilla extract
1 1/2 C. white whole wheat flour
1/2 tsp. baking soda
1/2 tsp. baking powder
1/2 tsp. salt
1 tsp. ground cinnamon
1 1/2 C. grated zucchini
Directions:
Preheat oven to 350 degrees F. Spray a 9×5 inch loaf pan with cooking spray.
In the bowl of a stand mixer, add the sugar, brown sugar, applesauce, oil, egg whites, and vanilla. Mix on medium speed until well combined.
Add the flour, baking powder, baking soda, salt, cinnamon & zucchini to the mixing bowl. Stir just until no dry flour remains, trying not to over mix.
Pour the batter into the loaf pan. Bake for 50 to 55 minutes. A toothpick inserted into the center of the bread should come out with moist crumbs on it.
Remove from oven and allow to cool completely before slicing.
Store covered on the counter or in the refrigerator.
The post Classic Zucchini Bread appeared first on Farm Girl Next Door.
]]>The post Healthy Chocolate Peanut Butter Zucchini Bread appeared first on Farm Girl Next Door.
]]>
The best compliment I can get when I make a healthy dessert is, “I don’t believe you, there’s no way this is healthy.”
Disbelief means I met my goal.
I didn’t get an…”it’s good, but there’s just something different about it.”
Nope, this recipe is just plain really good with the benefit that it happens to be a healthier alternative to classic zucchini breads.
It’s so chocolatey that it feels indulgent, but it’s sweet enough with the honey and applesauce that no one misses the refined sugar.
Give this one a try — you won’t be disappointed!
Ingredients:
1 C. packed, shredded zucchini, squeezed of excess moisture
4 oz. cup unsweetened applesauce
1/4 C. natural, creamy peanut butter
1/3 C. cocoa powder
1/3 C. honey
1 tsp. vanilla
2 eggs
1/2 tsp. baking powder
1/2 tsp. baking soda
1/4 tsp. salt
1 C. white whole wheat flour
1/4 C. mini semi-sweet chocolate chips (+ a few more for topping)
Directions:
Preheat oven to 350 degrees F. Spray an 8 inch glass loaf pan with cooking spray and set aside.
To the bowl of an electric mixer, add zucchini, applesauce, peanut butter, cocoa, honey, vanilla and eggs.
Mix on medium speed until well combined. Be sure to stop and scrape down the sides at least once while mixing.
Add baking powder, baking soda, salt and flour to the mixing bowl.
Mix on low speed until just combined. Be sure not to over mix.
Scrape down the sides of the bowl and add the chocolate chips. Mix until chocolate chips are just combined.
Pour the batter into the prepared loaf pan and top with a few additional chocolate chips.
Bake for 50 – 55 minutes or until a toothpick inserted in the center comes out with just a few crumbs.
When ready to eat, place the slice in the microwave for a few seconds so the chocolate chips melt. I also like to spread a bit of peanut butter on mine!
The post Healthy Chocolate Peanut Butter Zucchini Bread appeared first on Farm Girl Next Door.
]]>The post Healthy Zucchini Brownies appeared first on Farm Girl Next Door.
]]>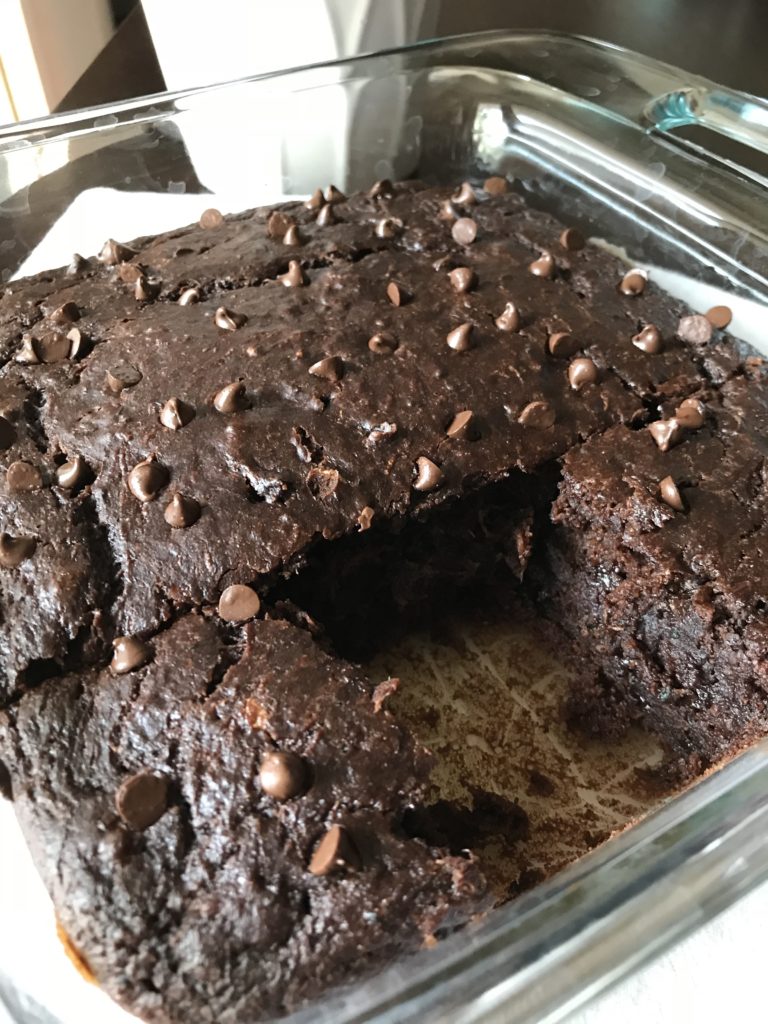

I’m not sure why I keep planting so many zucchini plants in my garden every year when I know that one plant produces more zucchini than I can possibly use.
But, here we are.
Another zucchini season = another opportunity for me to find creative ways to use it!
One recipe I’ve been testing and looking for for a LONG time is the BEST zucchini brownie recipe.
Don’t get me wrong, I’ve found some good ones in my hunt. However, I think you’re going to like this one the best. I sure do.
Ingredients:
1 egg
1/4 C. real maple syrup
1/4 C. brown sugar
1 tsp. real vanilla extract
1/4 C. creamy almond butter
1/4 C. non-fat, plain greek yogurt
1/2 tsp. baking soda
1/2 tsp. salt
1/2 C. cocoa powder
3/4 C. white whole wheat flour
1 C. finely shredded zucchini, squeezed of all excess moisture — this is IMPORTANT. (I use the fine grate side of my box grater & squeeze the zucchini out in a paper towel until all extra moisture is out.)
1/2 C. mini semisweet chocolate chips + plus more for the top
Directions:
Preheat oven to 350 degrees.
Spray an 8×8 glass baking dish with cooking spray.
In the bowl of an electric mixer, place the egg, maple syrup, brown sugar, vanilla, almond butter, and greek yogurt. Mix until well combined.
Add baking soda, salt, cocoa and whole wheat flour. Mix until just combined. Do not overmix!
Add in the zucchini and chocolate chips and mix until just combined. Be sure to scrape down the sides of the bowl to make sure everything is incorporated.
Pour the brownie mixture in the prepared dish and top with a few additional chocolate chips, if desired.
Bake for 30-35 minutes, or until a toothpick inserted in the center comes out with just a few crumbs.
The post Healthy Zucchini Brownies appeared first on Farm Girl Next Door.
]]>The post Curried Cauliflower & Chickpea (or chicken!) Salad appeared first on Farm Girl Next Door.
]]>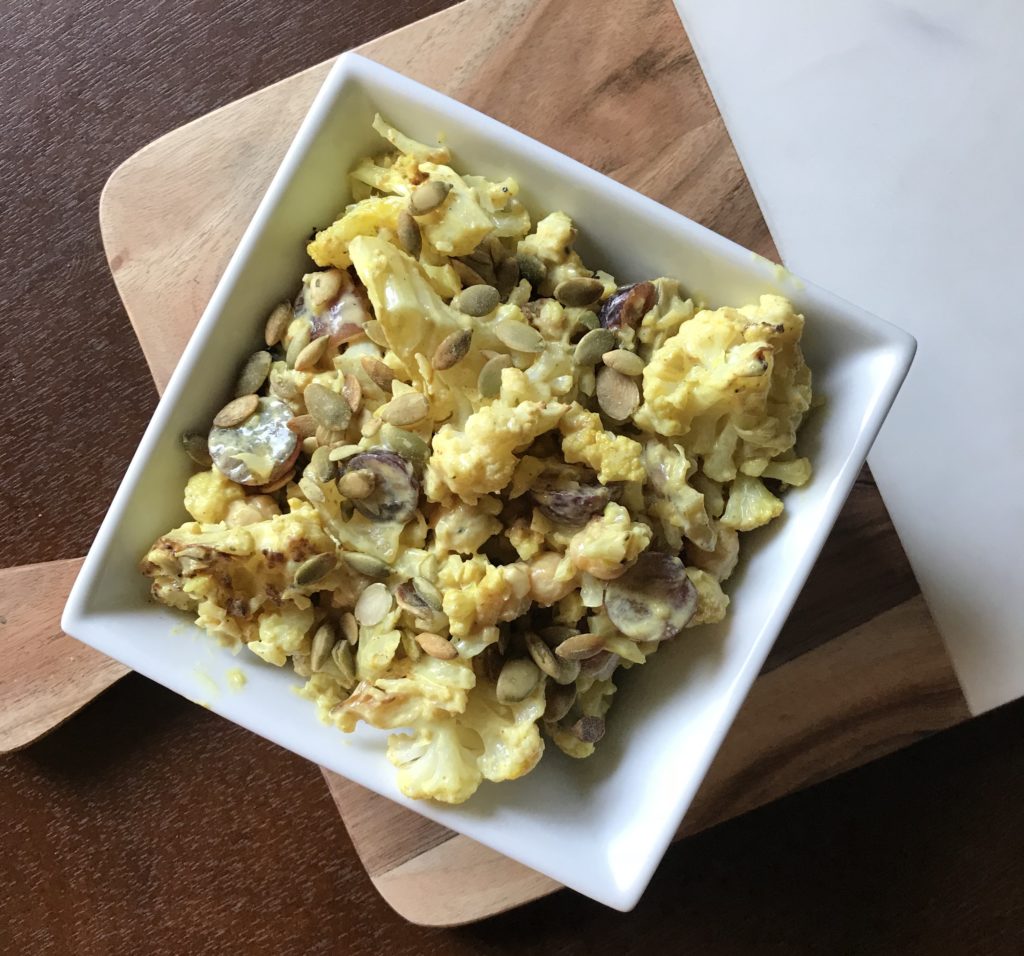
This recipe definitely isn’t your tried and true, tattered recipe card, kind of recipe.
Instead, this one is a “push you out of your comfort zone” kind of recipe!
It is so unexpectedly delicious, I think you’ll be surprised at how much you like it.
If cauliflower or chickpeas aren’t your thing, definitely try it with rotisserie chicken instead!
It would be great with chicken and served wrapped in a whole wheat tortilla, pita, or in lettuce wraps.
How will you choose to enjoy it?
Ingredients:
1 Tbsp. olive oil
1 large head of cauliflower, cut in small florets
1 small red onion, cut in 1/2 inch pieces
3 cloves of garlic, whole
salt and pepper
1/2 tsp curry powder
1 15.5 oz. can chickpeas, drained & rinsed
1 C. red grapes, halved
SAUCE:
3/4 C. plain greek yogurt (non-fat or 2%)
1 Tbsp. tahini
1 Tbsp. honey
1 Tbsp. dijon mustard
1 tsp. curry powder (I used this one –> Penzey’s The Now Curry)
1/4 tsp. turmeric powder
salt & pepper, to taste
1 Tbsp water
salted pepitas or sunflower seeds, to serve –> DON’T leave this out, the salad needs some crunch!
Directions:
Pre-heat oven to 425 degrees F.
Line a large baking sheet with aluminum foil and spray with cooking spray.
Place the cauliflower, onions & garlic on the baking sheet. Drizzle with the olive oil and sprinkle with salt and pepper and curry powder.
Bake for 30 minutes, turning halfway through.
Meanwhile, place the chickpeas and grapes in a large bowl and set off to the side.
Prepare the sauce. Place all ingredients in a mason jar, cover with a lid and shake until fully incorporated.
Once the vegetables are done roasting, find the garlic cloves and mince small. Add the garlic to the bowl of chickpeas and grapes.
Allow the vegetables to cool, then place them in the bowl with chickpeas and grapes and pour the sauce over everything. Mix well.
Serve and sprinkle with pepitas*!
*Note: Unless this recipe will be eaten in one sitting, do not mix the pepitas in or they will lose their crunch. Instead, add them to each serving when you’re ready to enjoy!
Did you try this with chicken instead? Let me know on Instagram by tagging @nefarmgirlnextdoor!
The post Curried Cauliflower & Chickpea (or chicken!) Salad appeared first on Farm Girl Next Door.
]]>The post Healthy Blueberry Muffins! appeared first on Farm Girl Next Door.
]]>
I like to think that at some point I’ll be that person that has enough time in the morning to make myself a perfectly balanced egg white omelette or stand by a pot and make slow cooked steel cut oats.
But, let’s be real, I’m not a person with that kind of time in the AM.
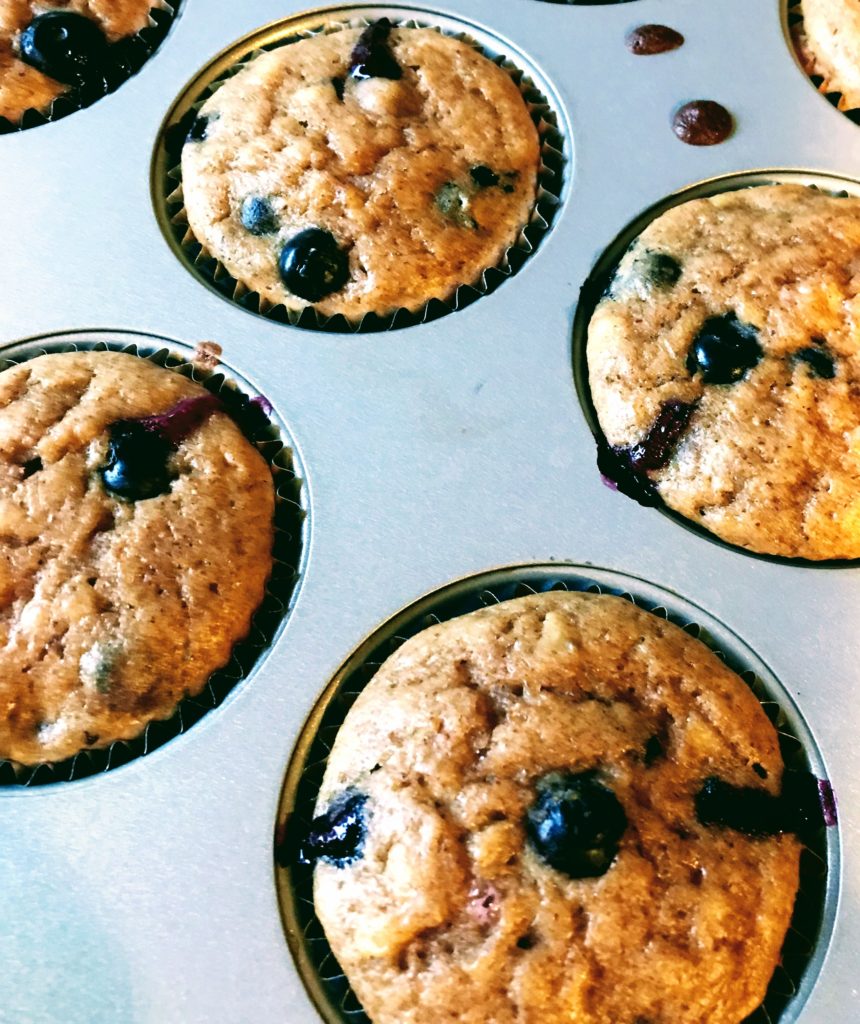
These healthy blueberry muffins make me feel like that person though…without actually having to wake up earlier.
WIN.
Show me how you enjoy these muffins during your breakfast routine!
Share a picture on Instagram and be sure to tag me (@nefarmgirlnextdoor)!
Ingredients:
3 medium very ripe bananas, peeled
2 large eggs
1/2 C real maple syrup or honey
1 tsp vanilla extract
1/2 C nonfat plain greek yogurt
1/4 C natural creamy almond butter
1 tsp ground cinnamon
1/2 C whole wheat flour
1/2 C (less 1 Tbsp–>set aside for the blueberries) all-purpose flour
1 Tbsp cornstarch
1/2 tsp baking soda
1/4 tsp salt
1 C fresh blueberries, rinsed & patted dry
Directions:
Pre-heat oven to 350 degrees F. Line 18 of the cavities in a muffin tin(s) with liners. I prefer foil liners over paper to lock in moisture.
In the bowl of an electric mixer, add the bananas and mix on low/medium speed until completely mashed.
Add eggs, maple syrup, vanilla extract, greek yogurt, almond butter & cinnamon to the bananas in the mixing bowl. Mix & combine completely.
To the mixing bowl, add both flours, cornstarch, baking soda and salt. Mix until just combined, be careful not to over-mix.
Take the 1 Tbsp of flour that was set aside, and toss the blueberries in the flour.
Carefully fold the blueberries in the batter with a spatula.
Fill the 18 liners in the muffin tin with batter. (I like to use an ice cream scoop like this one to make it fast & easy.) Sprinkle the top of each muffin with a few extra blueberries, if desired.
Bake in the pre-heated oven for 18-22 minutes or until a toothpick comes out clean when inserted into the center of the muffin.
Serve warm out of the oven or heat for 10-15 seconds in the microwave when ready to eat.
The post Healthy Blueberry Muffins! appeared first on Farm Girl Next Door.
]]>The post Chilled Fruit ‘Soup’ appeared first on Farm Girl Next Door.
]]>
Are you currently asking yourself if I meant to say, ‘soup’?
Because yes, yes I did mean to say that.
This recipe came as a result of my mom recreating one of our favorite dishes from a little bed and breakfast.
At the time, we also thought fruit soup sounded odd, but too interesting not to try.
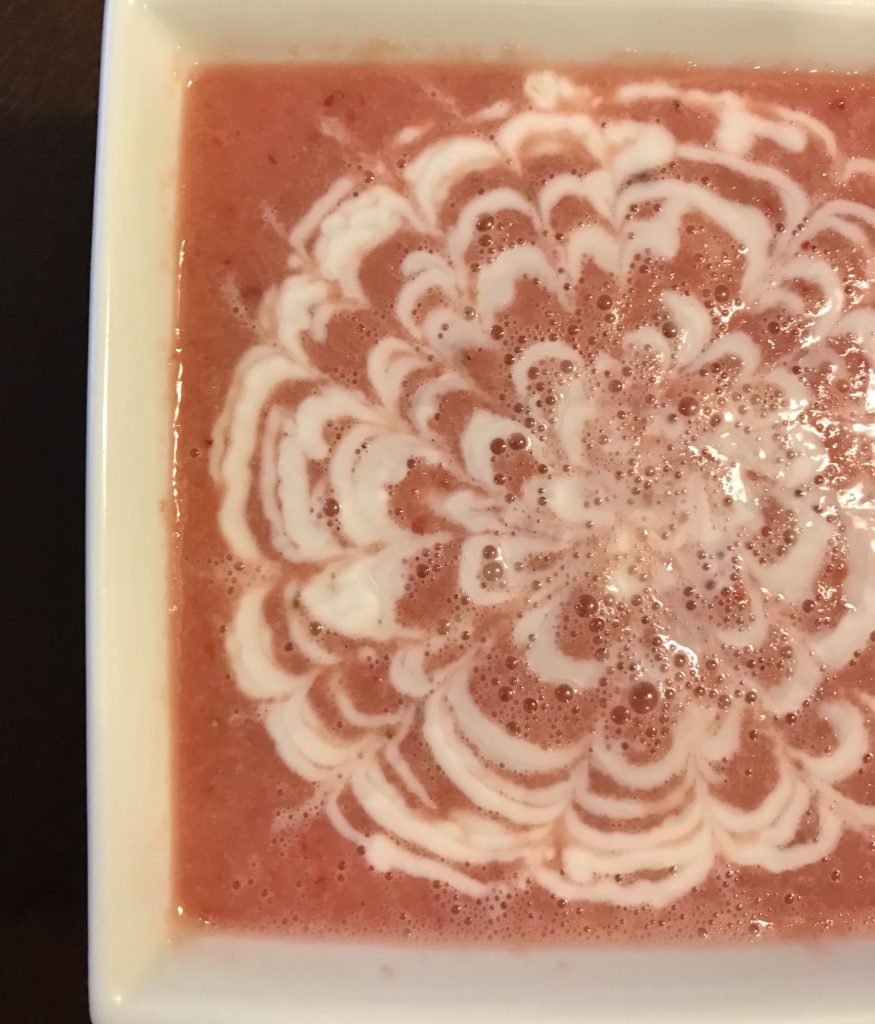
It is seriously one of my favorite things to make in the summer–perfectly refreshing as an appetizer or snack! Also, super impressive for guests when you do the swirl on top
Ingredients:
SOUP:
4 C. watermelon, cut into bite-sized pieces
1/2 of a 1 lb. carton of strawberries
1 tsp. pure vanilla extract
4-6 ice cubes
3 Tbsp. powdered sugar
3 Tbsp. non-fat, plain greek yogurt OR light sour cream
SWIRL:
2 Tbsp powdered sugar
4 Tbsp non-fat, plain greek yogurt
1 tsp. vanilla
Directions:
Place all soup ingredients in a blender and blend until smooth! (Be sure all the ice is blended and no chunks remain.) This –> is the blender I SWEAR by.
For the swirl, add all ingredients to a small ziplock sandwich bag.
Secure the bag and mix using your hand on the outside of the bag to move the ingredients around until fully incorporated.
With food scissors, cut a small piece off one of the corners of the bag for piping on the top.
Pour soup in a bowl and pipe a swirl with very little space between the swirl lines on top of the soup.
Take a toothpick and drag through from the outside of the swirl to the middle of the swirl, all the way around.
Serve immediately or store in an air-tight container in the refrigerator!
Show me how those swirls turned out for you! Tag me in a picture on Instagram @nefarmgirlnextdoor.
*This post may contain affiliate links in which I make a small commission at no additional cost to you.
The post Chilled Fruit ‘Soup’ appeared first on Farm Girl Next Door.
]]>The post Avocado Mango Salsa appeared first on Farm Girl Next Door.
]]>
Who feels like they’re going to cut their hand off every time they try to wrestle the pit out of an avocado?
If you raised your hand, I’m right there with you.
When I saw the Eat Fresh set with the avocado tool from Microplane, I knew it would be worth a try for not only my hand’s safety, but also the integrity of the avocado (I tend to smash it in the process of pit wrestling).
And I was right, this tool was absolutely worth a try–it is IMPRESSIVELY easy. Not to mention, it does three jobs and takes up less room than some of my kitchen knives. And in a small kitchen, that kind of efficiency is key.
Oh, and it keeps my hand nice and safe. (yesss!)
The Microplane Eat Fresh Set Avocado Tool & Twist and Zest is exactly what you need to make quick work of the avocado and lime prep in this recipe, or any recipe you use lime and avocado (which I hope you do often because it’s an amazing combination).
These tools have earned their place in my favorite utensil drawer…yes, I do have an ‘unfavorite’ utensil drawer.
I’ve included a few pictures of the prep process below so you can see how easy it truly is!
Use the straight edge of the Avocado tool to cut the avocado in half:
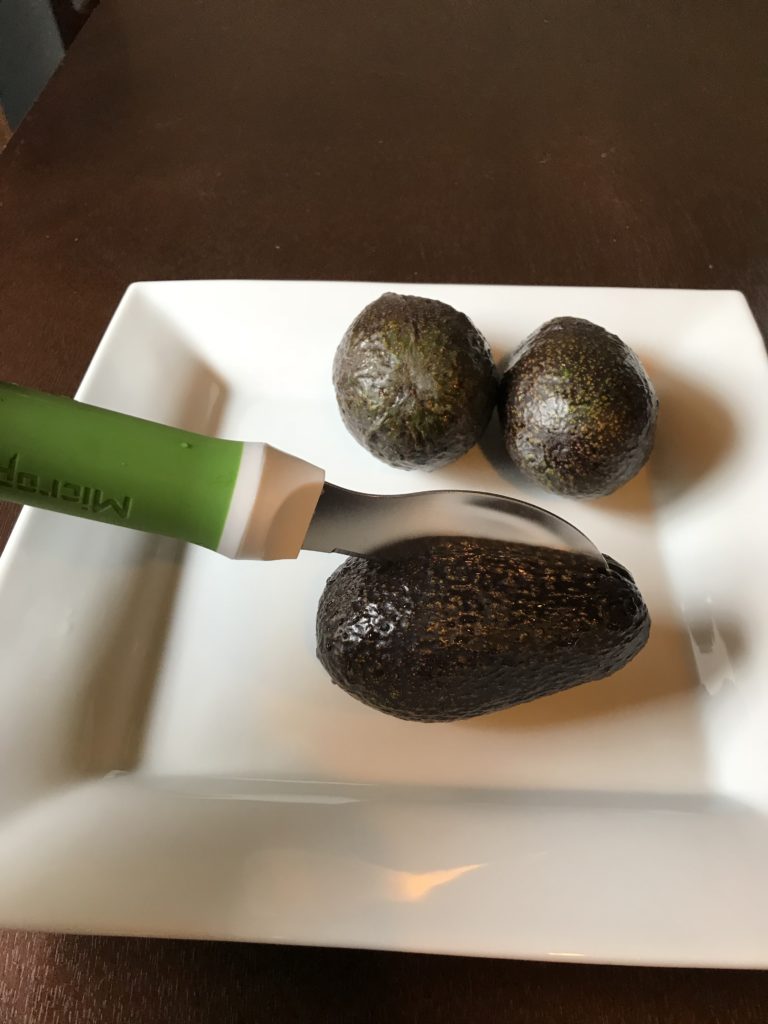
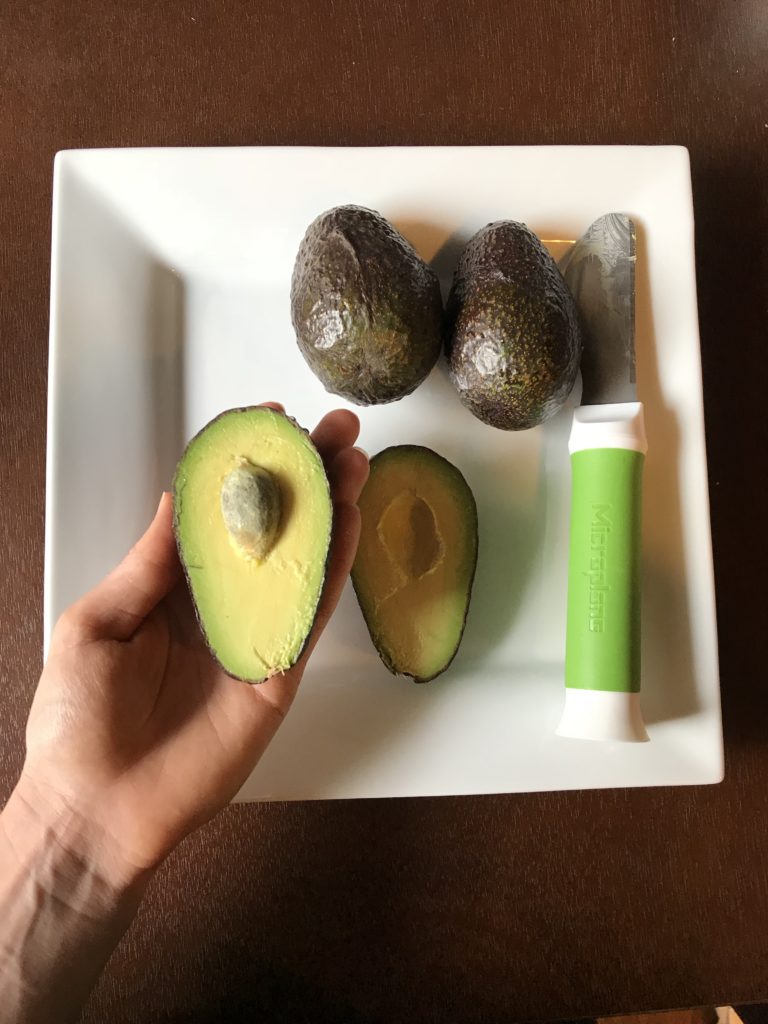
Press the bottom of the tool onto the pit so the prongs can grab. Gently twist and lift up to remove the pit. (SO much safer than slapping a knife on it!)
While still in the skin, slice the avocado lengthwise, then widthwise to dice.
Use the curved edge of the tool to scoop the avocado chunks out of the skin and right into the bowl for the salsa!
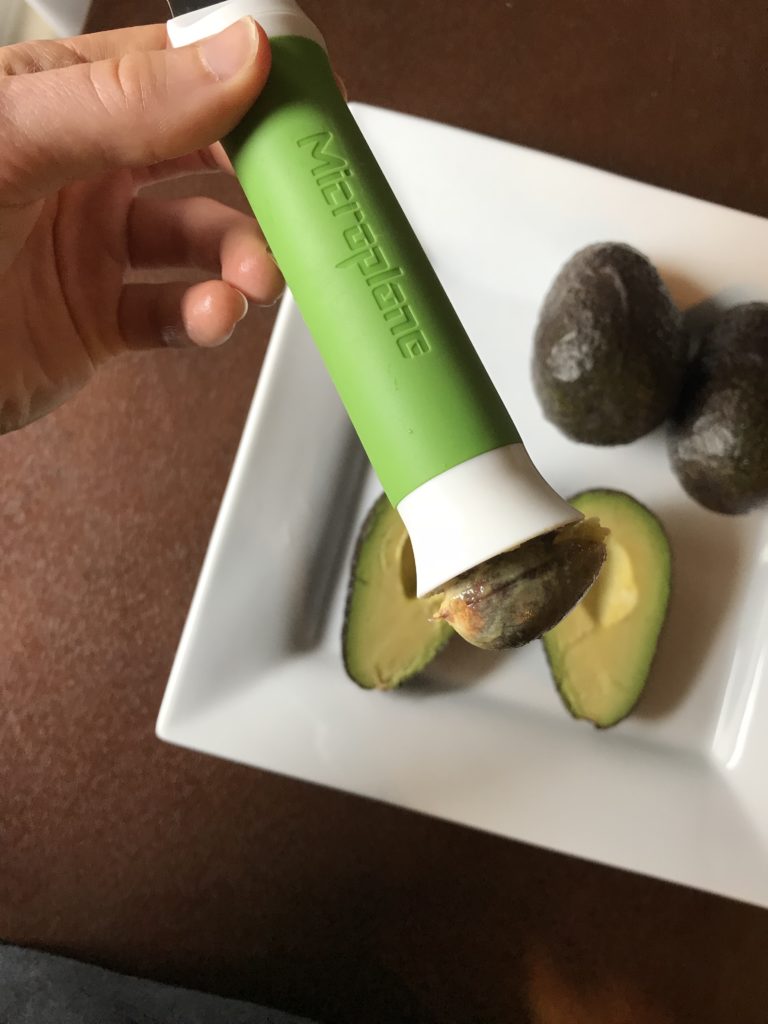

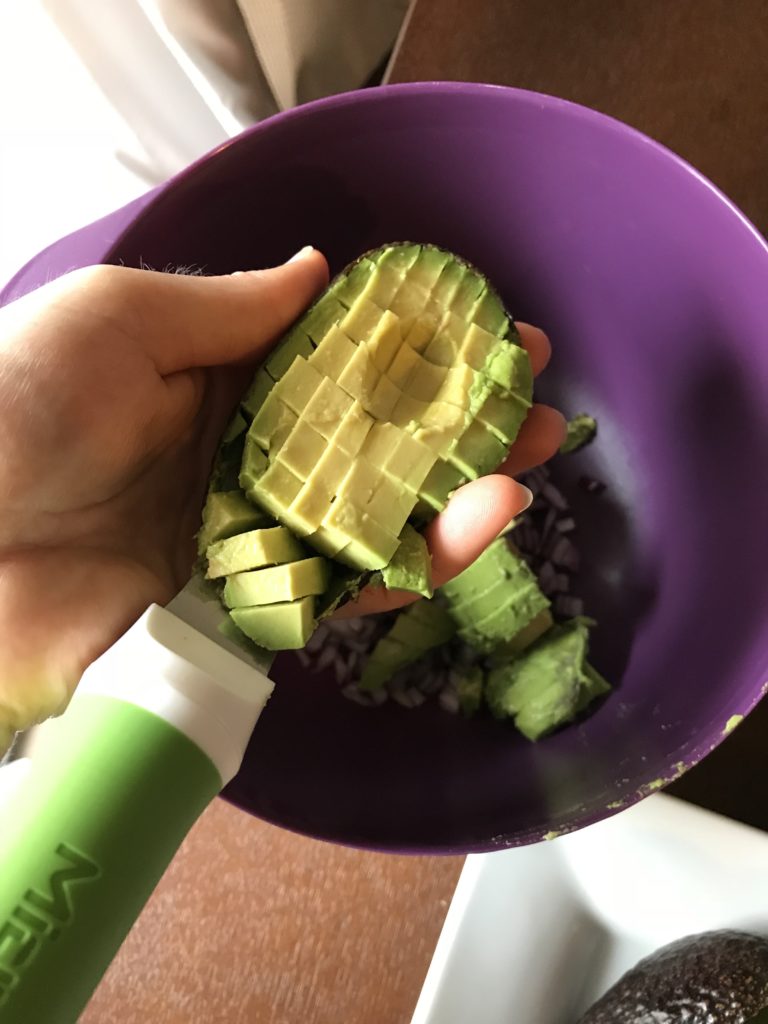
Ingredients:
2 small to medium avocados, diced small (using the Microplane Avocado Tool)
2 mangoes, diced small
1/2 C. red onion, finely chopped
1 jalapeño, finely chopped
1/2 a bunch of cilantro, chopped
zest of 1 small lime (using the Microplane 3 in 1 Twist & Zest)
lime juice from 2 small limes (using the Microplane 3 in 1 Twist & Zest)
1 Tbsp honey
1 Tbsp olive oil
sea salt & freshly cracked black pepper, to taste
Directions:
Place all ingredients in a bowl and gently mix until combined.
Serve over chicken, fish, steak, or simply with tortilla chips!
My personal favorite way to eat it: served over this salmon!
Store any remaining salsa in the refrigerator.
The post Avocado Mango Salsa appeared first on Farm Girl Next Door.
]]>The post Chocolate Banana Greek Yogurt Muffins appeared first on Farm Girl Next Door.
]]>
What do I love about muffins? They cook much faster than bread (I’m looking at you taking an hour in the oven, banana bread.) and they’re already pre-portioned and easy to pack/take places.
I know most of you inevitably end up with a few over-ripe bananas on the counter, and this is the perfect recipe to use those up! These muffins are packed with protein from greek yogurt and peanut butter and are healthy enough to be eaten for breakfast, even though they taste like dessert.
Snap a picture when you try this recipe & be sure to tag me on Instagram when you do! @nefarmgirlnextdoor
Ingredients:
3 medium very ripe bananas, peeled
2 large eggs
1/2 C real maple syrup or honey
1 tsp vanilla extract
1/2 C nonfat plain greek yogurt
1/4 C natural creamy peanut butter (melted if refrigerated)
1/4 C cocoa powder
1/2 C whole wheat flour
1/2 C (less 1 Tbsp) all-purpose flour
1 Tbsp cornstarch
1/2 tsp baking soda
1/4 tsp salt
1/2 C dark chocolate chips + additional for sprinkling before baking
Directions:
Pre-heat oven to 350 degrees F. Line 18 of the cavities in a muffin tin(s) with liners. I prefer foil liners over paper to lock in moisture.
In the bowl of an electric mixer, add the bananas and mix on low/medium speed until completely mashed.
Add eggs, maple syrup, vanilla extract, greek yogurt, peanut butter & cocoa powder to the bananas in the mixing bowl. Mix & combine completely.
To the mixing bowl, add both flours, cornstarch, baking soda and salt. Mix until just combined, be careful not to over-mix. Fold in the 1/2 C of chocolate chips with a spatula.
Fill the 18 liners in the muffin tin with batter. (I like to use an ice cream scoop like this one to make it fast & easy.) Sprinkle the top of each muffin with a few chocolate chips, if desired.
Bake in the pre-heated oven for 18-22 minutes or until a toothpick comes out clean when inserted into the center of the muffin.
Serve warm out of the oven or heat for 10-15 seconds in the microwave when ready to eat. Add a spread of peanut butter if desired!
The post Chocolate Banana Greek Yogurt Muffins appeared first on Farm Girl Next Door.
]]>